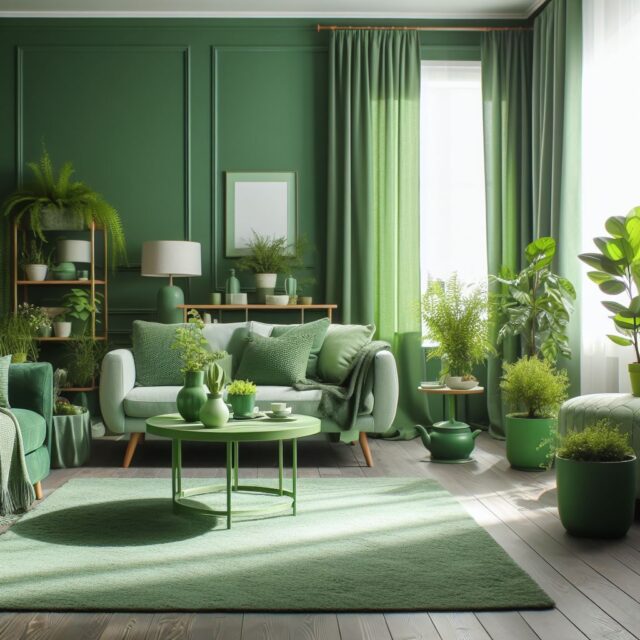
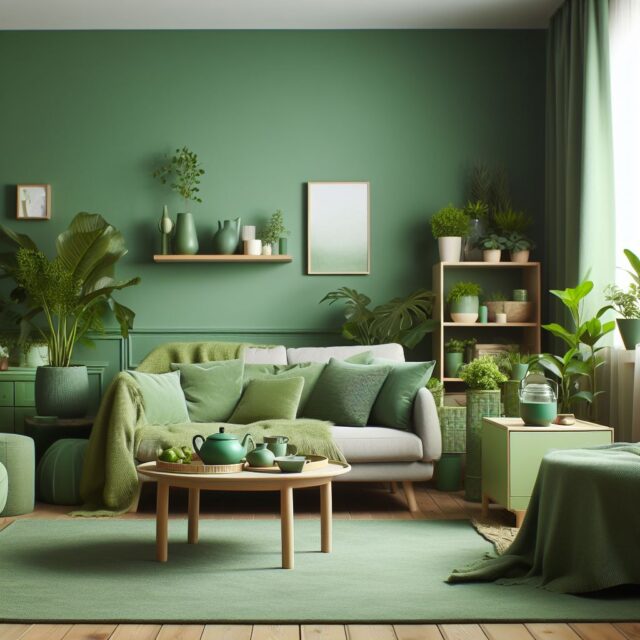
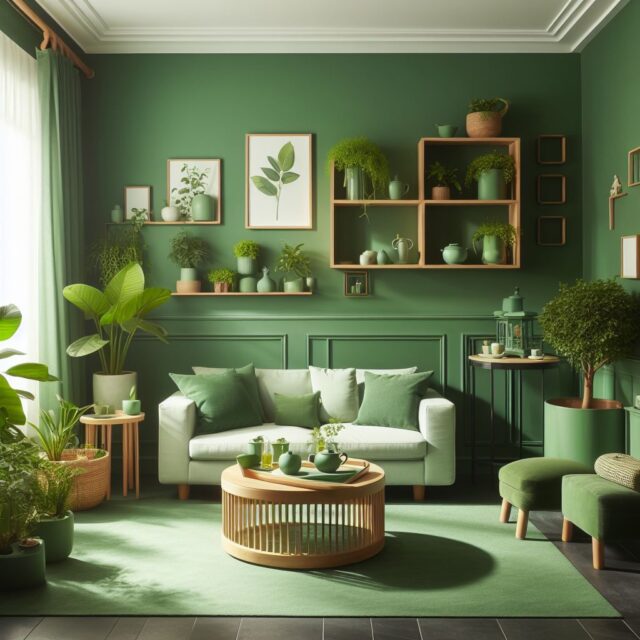
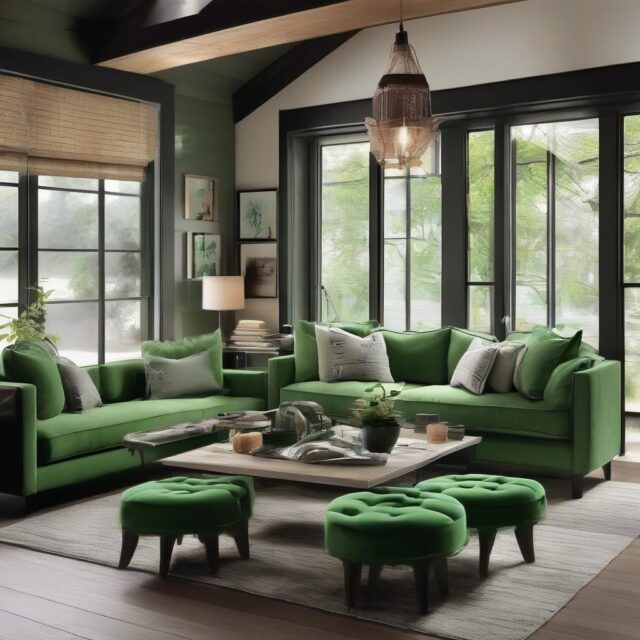
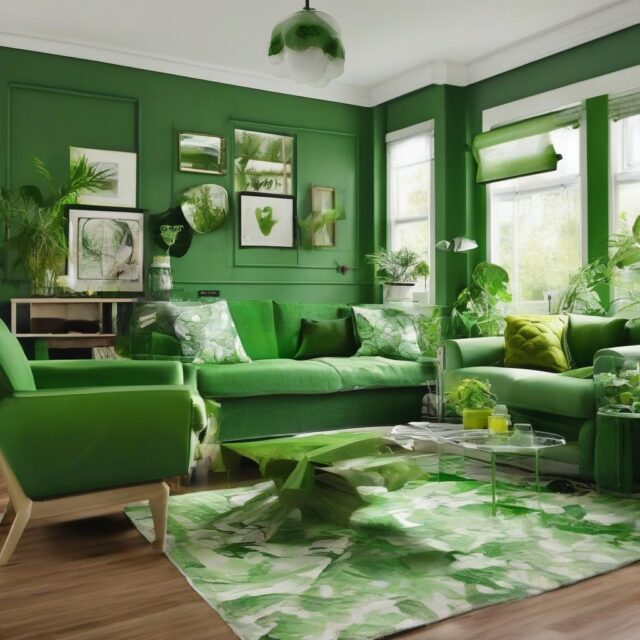
- Painting: Choose a new color or finish to refresh the look of your space. Consider using an accent wall for added interest.
- Wallpaper: Applying wallpaper can create a unique pattern or texture. There are many peel-and-stick options available for easy installation.
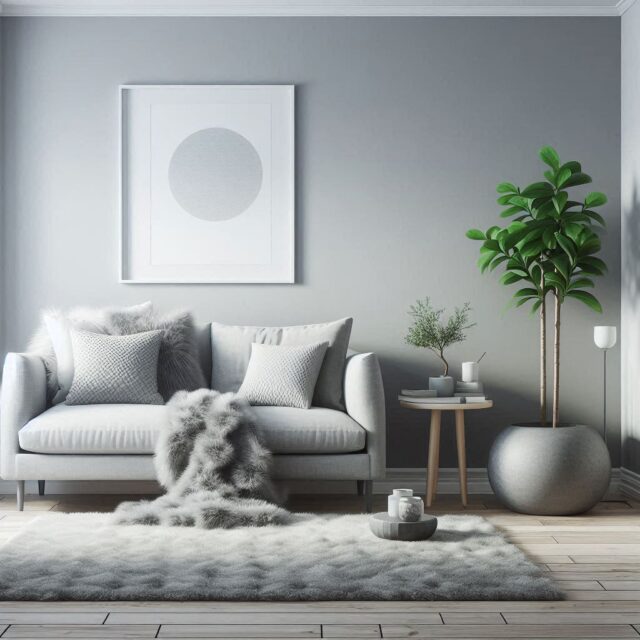
- Wall Art: Adding artwork, photographs, or framed prints can personalize your walls. Consider a gallery wall layout for an eclectic look.
- Wall Panels: Wood, shiplap, or decorative panels can add dimension and warmth to a room.
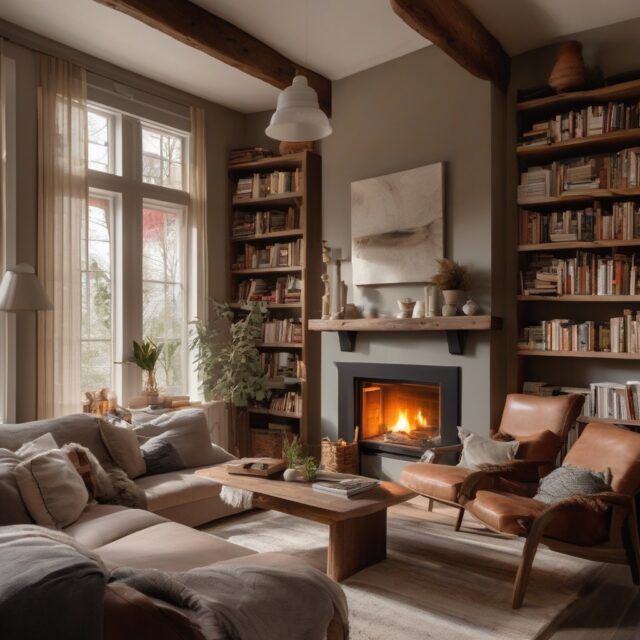
- Shelving: Installing shelves can be both functional and decorative, providing space for books, plants, or decorative items.
- Mirrors: Adding mirrors can create the illusion of more space and reflect light, making the room feel brighter.
What type of update are you considering? I can provide more specific advice based on your goals!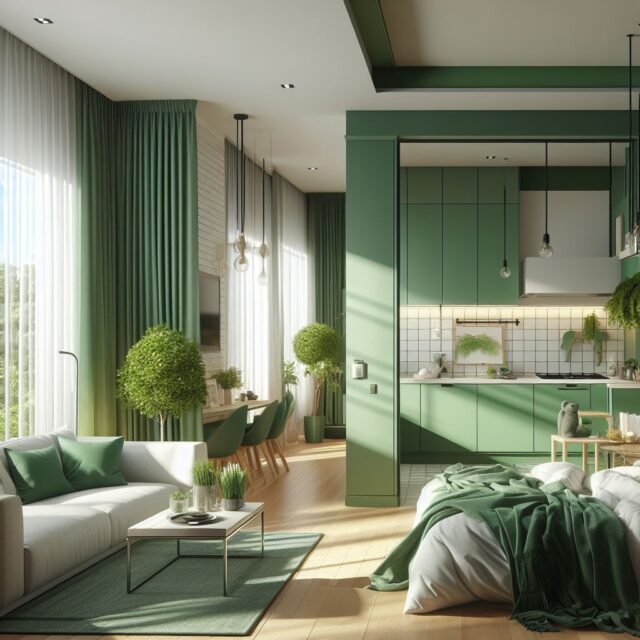

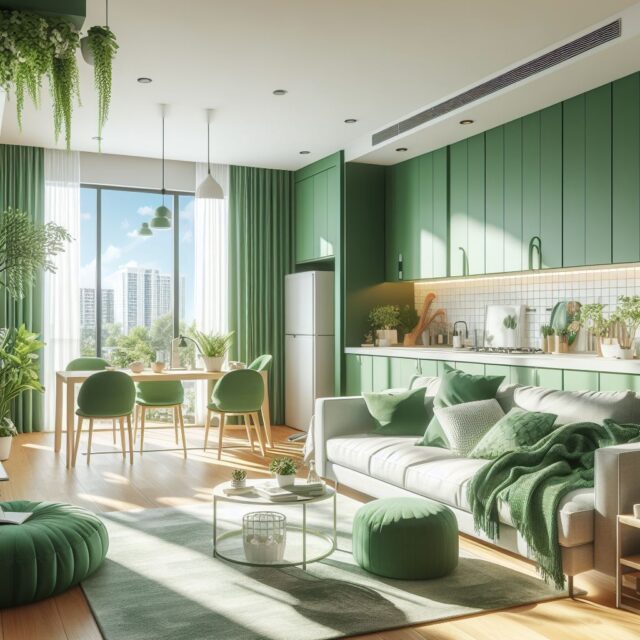
When you want to give your home a fresh look, painting the exterior is a top choice. However, the process doesn’t end with choosing the perfect color. Knowing how long it takes for the exterior paint to dry is crucial for a successful and lasting finish. This simple yet vital piece of information ensures you plan your project effectively and avoid any unwanted surprises.
Now, imagine having a reliable guide through this painting journey. This is where Simpco Painting, your trustworthy painter in Richmond, VA, comes into play. As we look into the factors influencing drying times and essential tips, remember that having a dependable resource like Simpco Painting can make your painting experience not only hassle-free but also rewarding. Let’s examine exterior paint drying together.
Factors Influencing Drying Time
Humidity Levels Matter
When it comes to the drying time of exterior paint, the humidity levels in your environment play a crucial role. Picture humidity as a behind-the-scenes player that can either support or challenge your painting endeavors.
High Humidity
In regions with high humidity, the drying process becomes a bit more demanding. The surplus moisture in the air acts like a slow dance partner, making the paint take its time to dry. Challenges arise as the excessive humidity hinders the efficient evaporation of water in the paint. This can lead to prolonged drying times, testing your patience and delaying the completion of your project.
Low Humidity
On the flip side, if you’re fortunate enough to reside in an area with low humidity, consider it a favorable hand dealt by nature. Low humidity expedites the drying process by allowing the water in the paint to evaporate more swiftly. It’s like having a breeze on a sunny day that dries your clothes in record time. The exterior paint embraces a quicker journey to a beautifully dried finish in low-humidity conditions. Understanding the impact of humidity on drying times helps you navigate your painting project more effectively.
Temperature’s Role
The temperature outside is another key player in the intricate dance of exterior paint drying. Let’s unravel the connection between temperature and the duration it takes for your paint to set.
Warm Weather
In exterior paint, warm weather is like a trusty sidekick, speeding up the drying time. When the sun graces your project with its warmth, the heat becomes a catalyst for the evaporation of water in the paint. This efficient process means your paint gets to dry faster, allowing you to revel in the results sooner.
Cold Weather
Conversely, when the weather takes a chilly turn, challenges in the drying process can arise. Cold temperatures can be likened to a sluggish companion, slowing down the evaporation of water in the paint. This slowdown can lead to potential delays in the drying time. It’s comparable to the difference between drying off after a warm shower versus a cold one – the warmth expedites the process. Understanding how temperature influences drying times equips you with the knowledge to plan your exterior painting project accordingly.
Type of Paint Used
The type of paint you choose for your exterior surfaces can significantly influence the drying characteristics of your project. It’s like picking the right tool for the job – each type comes with its own set of advantages and considerations.
Latex Paint
Latex-based paints are known for quicker drying times, making them a popular choice for many exterior projects. The magic lies in their water-based composition, allowing water to evaporate more efficiently than oil-based alternatives. This means that when you opt for latex paint, you’re choosing a paint that dries relatively faster, reducing the waiting time before enjoying the vibrant transformation of your home’s exterior.
Oil-Based Paint
On the flip side, if you decide to go for oil-based paints, it’s essential to note that they come with a trade-off – extended drying times. Oil-based paints contain different solvents that take a bit more time to evaporate compared to the water in latex paints. While oil-based paints offer durability and a unique finish, patience becomes a virtue as you wait for them to fully dry. Choosing oil-based paint is like opting for a scenic route – it may take a bit longer, but the results can be well worth the wait.
Understanding the characteristics of different paints arms you with the knowledge to make informed decisions for your exterior painting project.
Understanding Surface Conditions
Preparation Matters
Before you dive into exterior paint, taking a moment to appreciate the significance of proper surface preparation is like laying a solid foundation for a sturdy house. The success of your painting project hinges on the meticulous attention given to the surfaces you’re about to transform.
Clean Surfaces
Cleanliness, in this context, is not just a virtue but a game-changer. Picture your exterior surfaces as a canvas waiting for a masterpiece. If the canvas is laden with dust, dirt, or grime, the paint’s adherence becomes compromised. Clean surfaces provide a smooth and receptive canvas for the paint to bond with, ensuring not only a more vibrant result but also a quicker drying time. It’s akin to planting seeds in well-tilled soil – the foundation sets the stage for a flourishing garden. Therefore, before you unleash the colors, give your surfaces the TLC they deserve by ensuring they are thoroughly clean.
Primed Surfaces
Now, let’s talk about priming – the unsung hero in the world of exterior painting. Priming is like the pre-game warm-up before the main event. It involves applying a base coat to the surface, creating an ideal foundation for the paint to adhere and dry efficiently. Priming not only enhances paint adherence but also promotes a more uniform finish.
It acts as a facilitator, ensuring that the paint does its job effectively. It’s like preparing a canvas with a primer before creating a masterpiece – the results are smoother and more impressive. So, think of priming as an essential step in your exterior painting process, setting the stage for a successful and satisfying outcome.
Understanding the importance of surface preparation sets you on the path to a seamless painting experience.
Drying Times for Different Exterior Surfaces
When it comes to drying times for exterior paint, the type of surface you’re working with can add its nuances to the process. Let’s take a closer look at wood surfaces, which present a unique set of characteristics that influence how quickly or slowly your paint dries.
Wood Surfaces
Wood, being a porous material, has its rhythm when it comes to drying. The natural composition of wood allows it to absorb moisture, and this can impact the drying time of the paint. Picture it like a sponge – the more porous the wood, the more it can absorb, and consequently, the longer it may take for the paint to dry completely. So, when working with wood, it’s essential to consider its inherent qualities to plan for an optimal drying experience.
Softwoods vs. Hardwoods
Now, let’s delve into the distinction between softwoods and hardwoods. Softwoods, like pine or cedar, are less dense, allowing them to absorb paint more readily. On the other hand, hardwoods, such as oak or mahogany, with their denser composition, may require a bit more patience as the drying process takes a tad longer. Understanding the differences between softwoods and hardwoods guides you in anticipating and managing drying times based on the specific type of wood you’re dealing with.
Weathered vs. New Wood
Another factor to consider is the condition of the wood surface – whether it’s weathered from exposure to the elements or freshly installed as new wood. Weathered wood may have absorbed moisture over time, affecting its drying characteristics.
In contrast, new wood, being less saturated, may allow for a more straightforward and potentially quicker drying process. Recognizing the distinctions between weathered and new wood helps you tailor your approach to achieve the best results for each type.
Brick and Masonry
Let’s now turn our attention to another set of exterior surfaces that bring their charm and challenges to the painting scene – brick and masonry. Understanding how paint interacts with these materials is crucial for achieving the desired results in both aesthetics and longevity.
Porosity
Brick surfaces, with their unique porous nature, add an interesting dynamic to the drying times of exterior paint. Imagine the surface of a brick as a series of tiny pores or spaces. These pores can absorb moisture, influencing how quickly the paint dries. The more porous the bricks, the more patience may be required as the paint navigates through these tiny channels. So, painting on brick is akin to a delicate dance, where the porosity of the surface plays a key role in determining the pace of the drying process.
Sealed vs. Unsealed
Now, let’s consider the impact of sealing on brick and masonry surfaces. Sealing involves applying a protective layer on the surface to enhance durability and resistance to external elements. When bricks are sealed, it creates a barrier that affects the absorption of paint.
This sealing process can result in a smoother, less porous surface, potentially expediting the drying time of the paint. Picture it like rain on a waterproof jacket – the water beads up and rolls off, creating a less absorbent surface. Understanding the difference between sealed and unsealed brick surfaces guides your approach to ensure optimal drying times and a lasting finish.
Tips for Ensuring Efficient Drying
As we look into the practical aspects of exterior painting, let’s explore some valuable tips that can significantly enhance the efficiency of the drying process, ensuring a seamless and timely outcome for your painting project.
Thin Coats
The thickness of each paint coat holds more significance than meets the eye. Opting for multiple thin coats offers a range of benefits. Not only does it promote quicker evaporation of water, expediting the drying process, but it also minimizes the risk of drips and sags. Consider it as a gradual approach, where each thin coat contributes to a progressively layered and beautifully finished surface. This technique facilitates a faster drying time, ensuring a more even and professional-looking result.
Adequate Ventilation
Ventilation plays a pivotal role in the drying equation, acting as the unsung hero that fosters optimal drying conditions. Good airflow, whether indoors or outdoors, is akin to a breath of fresh air for your freshly painted surfaces. Adequate ventilation allows the water in the paint to evaporate more efficiently.
Consider the difference between a well-ventilated room and a stuffy one – the former allows air to circulate, facilitating the escape of moisture. Incorporating good ventilation practices, such as opening windows, using fans, or harnessing natural air currents, not only speeds up the drying time but also contributes to a healthier painting environment. It’s a simple yet impactful strategy that ensures your surfaces dry efficiently and thoroughly.
By embracing these practical tips in your painting routine, you’re not only streamlining the drying process but also setting the stage for a more successful and satisfying project.
Key Takeaways for Successful Exterior Painting
In concluding our discussion on exterior paint drying times, it’s essential to keep a few key points in mind. The duration for paint to dry is not uniform; it’s influenced by factors such as humidity, temperature, the chosen type of paint, and the condition of the surfaces being painted.
High humidity and colder temperatures may present challenges, while warmer weather and proper surface preparation can expedite the process. The type of paint, whether latex or oil-based, also contributes to varying drying times, and different surfaces like wood, brick, or masonry each require specific considerations.
Efficient drying is not left to chance but results from thoughtful decisions. Applying multiple thin coats and ensuring adequate ventilation are practical tips that can make a significant difference. Thin coats enable quicker evaporation and a smoother finish, while good airflow aids in the escape of moisture, hastening the drying time.
As you undertake your painting project, keep in mind that accurate drying time estimates are crucial. By considering the interplay of these various factors, you set yourself up for success, ensuring a beautifully finished exterior that withstands the test of time.
Transform Spaces with Simpco Painting: Your Expert Partner in Henrico, VA
If you’re ready to enhance your space with expert painting services, consider Simpco Painting. Located at 8536 Sanford Drive, Henrico, VA, 23228, we are committed to delivering top-notch results. Call us at 804-840-9419 for personalized assistance or visit https://simpcopainting.com/ to explore our services and see how we can bring your vision to life. Your pathway to a vibrant and refreshed exterior begins with Simpco Painting – your trusted partner in transforming spaces.
]]>Now, lets see more in detail…
The world of paint can be a bit confusing, especially when you’re faced with projects that involve both interior and exterior surfaces. At Simpco Painting, your trusted Richmond house painters, we often get asked, “Can you mix interior and exterior paint?” In this guide, we’ll explore the possibilities, considerations, and expert advice to help you make informed decisions for your painting projects.
Understanding Interior and Exterior Paint Differences
Differences in Formulation
Interior and exterior paints are distinct in their formulations:
- Interior Paint: Interior paints are designed for use inside your home or building. They contain additives that make them resistant to common indoor issues like scuffs, stains, and mildew. These paints prioritize easy application, low odor, and quick drying.
- Exterior Paint: Exterior paints, on the other hand, are formulated to withstand outdoor elements. They have higher resistance to moisture, UV rays, temperature fluctuations, and mold. Exterior paints are more robust and durable to protect your property’s surfaces from harsh weather conditions.
Performance Variations
The differences in formulation result in varying performance characteristics:
- Interior Paint Performance: Interior paints excel at providing smooth finishes and vibrant colors. They’re ideal for walls, ceilings, and indoor surfaces but may not endure outdoor exposure well.
- Exterior Paint Performance: Exterior paints prioritize longevity and protection. They can withstand rain, sunlight, and temperature changes, ensuring your property remains well-protected and aesthetically pleasing.
Understanding these formulation and performance distinctions is essential when deciding whether or not to mix interior and exterior paints for your projects.
Can You Physically Mix Them?
Compatibility Concerns
- Compatibility Concerns: Physically mixing interior and exterior paints can lead to compatibility issues. These paints have different chemical compositions, and combining them may result in clumping, uneven textures, or poor adhesion. Such compatibility problems can affect the paint’s ability to adhere to surfaces and its overall performance.
Impact on Finish
- Impact on Finish: Mixing interior and exterior paints can also have consequences for the finish. The finish may appear inconsistent, and the paint may not adhere uniformly to the surface. This can lead to a patchy and unattractive appearance, ultimately impacting the aesthetics of your project. To achieve a consistent and professional finish, it’s advisable to use the appropriate paint type for each specific surface.
Considerations for Hybrid Projects
When It’s Not Advisable
- When It’s Not Advisable: Mixing interior and exterior paints is generally not advisable in most cases. It’s particularly discouraged when:
- The project involves outdoor surfaces exposed to harsh weather conditions, as interior paints are not designed to withstand such elements.
- You seek a professional and lasting finish, as mixing paints can result in uneven application, affecting the overall quality.
Professional Consultation
- Professional Consultation: When you have a project that involves both interior and exterior surfaces, it’s crucial to seek professional consultation. Professional painters, like Simpco Painting, can assess your specific needs, offer expert guidance, and ensure the right paint types are used for each surface. Their expertise can save you time, money, and potential issues associated with mixing paints.
Simpco Painting’s Expert Opinion
Our Approach to Mixing Paints
- Our Approach to Mixing Paints: At Simpco Painting, we prioritize the quality and longevity of your paint projects. When it comes to mixing interior and exterior paints, our approach is meticulous. We consider the specific requirements of each surface, taking into account factors like exposure, aesthetics, and durability. However, we typically recommend using the appropriate paint types for each area to ensure the best results and lasting finishes.
Comprehensive Painting Solutions
- Comprehensive Painting Solutions: As your trusted Richmond house painters, Simpco Painting offers comprehensive painting solutions for both residential and commercial projects. Whether you need interior or exterior painting, our expertise covers it all. We understand the unique demands of each project and provide tailored recommendations to achieve outstanding results. With a commitment to excellence and customer satisfaction, Simpco Painting is your partner for all your painting needs.
Final Words:
The question of whether you can mix interior and exterior paint is one that requires careful consideration. While it may be possible in some cases, it’s essential to understand the differences, potential challenges, and consequences. For expert guidance and a wide range of painting solutions that cater to your unique needs, contact Simpco Painting, your dedicated Richmond house painters, at 804-840-9419. We’re here to ensure your painting projects result in stunning, long-lasting finishes.
]]>- Flat or Matte: Ideal for hiding imperfections, but less durable and harder to clean.
- Satin: Offers a subtle sheen, suitable for most exterior surfaces, easy to clean, and provides moderate durability.
Consider factors like weather exposure and maintenance when choosing the sheen for your exterior paint. Consulting with professional painters can help you make the best decision for your project.
Now, let’s get more into detail…
Choosing the right sheen for your exterior paint is a crucial decision that can impact both aesthetics and durability. At Simpco Painting, your trusted Richmond house painters, we understand the importance of this choice. In this guide, we’ll discuss different paint sheen options for your exterior surfaces, helping you make informed decisions that enhance the beauty and protection of your property.
Understanding Paint Sheen
What is Paint Sheen?
Paint sheen refers to the level of gloss or shine that paint exhibits when it dries on a surface. It determines the finish’s appearance and the paint’s overall durability. Here’s a breakdown:
- Flat or Matte Sheen: This type has no shine and provides a velvety, non-reflective finish. It’s great for concealing imperfections but may be less durable and challenging to clean.
- Satin Sheen: Satin sheen offers a subtle gloss that strikes a balance between aesthetics and durability. It’s versatile and easy to clean, making it suitable for various exterior surfaces.
Factors to Consider
When selecting the right sheen for your exterior paint, consider these essential factors:
- Surface Condition: Assess the condition of your exterior surfaces. Flat sheen may hide imperfections, while satin sheen is more forgiving on moderately uneven surfaces.
- Weather Exposure: Think about your region’s weather conditions. Satin sheen often performs better in challenging weather, thanks to its durability.
- Maintenance: Consider your willingness to maintain the paint. Satin sheen is easier to clean and maintain over time, which can save you effort in the long run.
- Aesthetic Preferences: Ultimately, your choice should align with your desired look. Flat sheen provides a subtle, elegant appearance, while satin offers a gentle sheen for added visual interest.
These factors will guide you in selecting the ideal sheen for your exterior paint, ensuring a finish that suits your needs and preferences.
Sheen Options for Exterior Paint
Flat or Matte Sheen
Flat or Matte Sheen provides a smooth, non-reflective finish to your exterior surfaces. Here’s what you need to know:
- Appearance: Flat sheen creates a velvety, elegant look with no shine or gloss. It’s perfect for achieving a subtle, understated aesthetic.
- Hide Imperfections: This sheen excels at concealing minor surface imperfections, making it ideal for older or weathered exteriors.
- Maintenance: While it’s great for hiding flaws, flat sheen is less durable and can be challenging to clean. It’s more susceptible to stains and may not withstand harsh weather conditions as well as other sheens.
Satin Sheen
Satin Sheen strikes a balance between aesthetics and durability, making it a versatile choice for exterior surfaces. Here’s what you should know:
- Appearance: Satin sheen offers a subtle gloss that enhances the visual appeal of your exterior. It’s not overly shiny but provides a touch of elegance.
- Durability: Satin sheen is more durable than flat sheen, making it suitable for areas exposed to the elements. It can withstand weather conditions better, maintaining its finish for an extended period.
- Easy to Clean: If you prioritize ease of maintenance, satin sheen is a favorable option. It’s relatively easy to clean and can handle occasional dirt and stains.
- Versatility: Satin sheen works well on various exterior surfaces, including siding, doors, and trim. Its versatility makes it a popular choice among homeowners.
When choosing between these sheen options for your exterior paint, consider factors like the condition of your surfaces, weather exposure, maintenance preferences, and the overall aesthetic you want to achieve.
Sheen Recommendations for Different Surfaces
Exterior Walls
When it comes to selecting the right sheen for different exterior surfaces, it’s essential to match the finish with the specific needs of each area. Here are recommendations for two common surfaces:
Exterior Walls
- For Exterior Walls, Satin Sheen is often the preferred choice. It strikes a balance between durability and aesthetics. Exterior walls are exposed to various weather conditions, so having a sheen that can withstand the elements while providing an elegant finish is ideal. Satin sheen is easy to clean and offers the longevity required for exterior walls.
Doors and Trim
- For Doors and Trim, you have the flexibility to choose between flat and satin sheens, depending on your preferences. Flat sheen can create a subtle contrast with walls and is excellent for a more traditional or understated look. Satin sheen, on the other hand, provides a touch of sophistication and is easier to clean, making it suitable for high-traffic areas like doors and trim.
Matching the right sheen to different exterior surfaces ensures not only an appealing appearance but also the longevity and functionality required for each specific area of your property.
Advantages of Professional Consultation
Why Consult a Professional Painter
Consulting a professional painter for your exterior paint project offers several valuable advantages:
- Expert Recommendations: Professional painters have extensive knowledge of different paint sheens and can recommend the most suitable option based on your specific needs, weather conditions, and aesthetic preferences.
- Surface Evaluation: They can assess the condition of your exterior surfaces, identifying any repairs or preparations needed before painting. This ensures a smooth and long-lasting finish.
- Color Coordination: Professional painters can help you choose not only the right sheen but also the perfect color palette that complements your property’s architecture and surroundings.
- Precise Application: Professionals have the skills and equipment to apply paint with precision, ensuring clean lines and even coverage.
- Time and Cost Efficiency: Hiring experts can save you time and money in the long run. They work efficiently and minimize wastage, providing cost-effective solutions.
Simpco Painting’s Expertise
When it comes to professional painting services, Simpco Painting stands out:
- Trusted Experience: With a proven track record, Simpco Painting brings years of experience to your project. They understand the unique demands of exterior painting.
- Local Expertise: As trusted Richmond house painters, Simpco Painting is familiar with the region’s weather conditions and can provide tailored recommendations for your exterior paint.
- Commitment to Excellence: Simpco Painting is dedicated to delivering top-quality results that enhance your property’s curb appeal and protection.
Final Words:
The choice of sheen for your exterior paint is more than just a visual preference; it impacts durability and maintenance. If you ever find yourself in need of expert advice or professional painting services, remember that Simpco Painting, your trusted Richmond house painters, is just a phone call away. Contact us at 804-840-9419 to ensure your exterior surfaces receive the perfect sheen that complements your property’s aesthetics and safeguards its longevity.
]]>- Gather your supplies: painter’s tape, measuring tape, paint, brushes, and drop cloths.
- Prepare the wall: clean, patch, and apply primer.
- Measure and mark guidelines for your stripes.
- Apply painter’s tape along the guidelines.
- Paint using a brush or roller along the tape’s edges.
- Remove the tape while the paint is slightly wet for clean lines.
- Perform touch-ups if needed and let the paint dry.
Now, let’s get into details:
Transforming your walls with stripes is a fantastic way to add a touch of elegance and personality to your space. At Simpco Painting, your trusted residential painting service in Richmond, VA, we believe in helping you achieve the look you desire. In this guide, we’ll walk you through the step-by-step process of painting stripes on your walls, allowing you to revitalize your interior with creativity and precision.
Gathering Your Supplies
Essential Painting Tools
Before you embark on painting stripes on your wall, it’s essential to gather the necessary tools and supplies. Here are the essential painting tools you’ll need:
- Painter’s Tape: High-quality painter’s tape helps create clean, crisp lines for your stripes. Ensure it’s designed for delicate surfaces if you’re painting over existing paint.
- Measuring Tape and Level: Accurate measurements are crucial for evenly spaced stripes. A measuring tape and a level ensure precision.
- Pencil and Chalk: These help mark your measurements and guidelines lightly on the wall, which can be easily erased or painted over.
- Drop Cloths: Protect your floor and furniture from paint splatters with drop cloths or plastic sheets.
- Paint Trays and Rollers: Use paint trays to hold your chosen paint colors, and high-quality rollers for efficient coverage.
- Paint Brushes: Small brushes come in handy for touching up edges and corners.
- Paint: Select the paint colors you want for your stripes. Ensure you have enough paint for your project.
- Paint Stirrers: Stir your paint thoroughly to ensure consistent color.
Selecting Paint Colors
Choosing the right paint colors for your stripes is a creative decision. Here’s how to go about it:
- Complementary Colors: Consider using complementary colors for a striking contrast or shades from the same color family for a subtle, harmonious look.
- Sample Swatches: Purchase small paint samples to test on a small wall section before committing to your final colors. This allows you to see how the colors look in your space and under your lighting conditions.
- Consider Room Decor: Think about your existing room decor and furniture. Your chosen stripe colors should complement your interior design.
- Number of Colors: Decide how many colors you want to use for your stripes. Whether it’s two or more, make sure they work well together.
By gathering these essential tools and carefully selecting your paint colors, you’ll be well-prepared to embark on your stripe painting project with confidence and precision.
Preparing the Wall Surface
Measuring and Marking
Before you start painting your stripes, meticulous measuring and marking are crucial to achieving a professional-looking result. Here’s how to go about it:
- Determine Stripe Width: Decide on the width of your stripes. Measure and mark the starting point for your first stripe, typically at one corner of the wall.
- Use a Level: To ensure that your stripes are perfectly straight, use a level to draw horizontal guidelines across the wall. These guidelines will serve as the reference for your stripes.
- Measure Spacing: Measure the desired space between each stripe and mark it along your guidelines. Use a measuring tape for accuracy.
- Check for Symmetry: Step back and assess the symmetry and alignment of your markings to ensure that your stripes will be even and visually appealing.
Wall Surface Preparation
Proper wall surface preparation ensures that your paint adheres well and your stripes look flawless. Here’s what to do:
- Clean the Wall: Remove any dust, dirt, or imperfections from the wall’s surface by wiping it down with a damp cloth. Allow it to dry completely before proceeding.
- Patch and Sand: Fill any holes, cracks, or imperfections with a suitable patching compound. Once it’s dry, sand the patched areas to create a smooth surface.
- Prime the Wall: Applying a primer can help ensure even paint coverage and prevent uneven absorption of paint. Use a primer that’s compatible with your chosen paint.
- Tape Over Guidelines: Carefully apply painter’s tape over the guidelines you’ve drawn. Ensure it adheres firmly to prevent paint bleed.
Properly measuring, marking, and preparing the wall surface is essential for achieving the desired look and ensuring that your painted stripes appear sharp and well-defined. Taking your time during this stage will pay off in the final result.
Creating Straight and Uniform Stripes
Using Painter’s Tape
To achieve straight and uniform stripes on your wall, proper use of painter’s tape is essential. Here’s how to go about it:
- Apply Painter’s Tape: Carefully apply painter’s tape along the guidelines you’ve drawn on the wall. Ensure that the tape adheres firmly and lies flat against the wall.
- Press and Seal Edges: Use a plastic putty knife or the edge of a credit card to press down the edges of the tape firmly. This prevents paint from seeping underneath.
- Create Crisp Corners: When you reach corners or edges, fold the tape to create crisp corners for a professional finish.
- Mask Adjacent Stripes: If you’re creating multiple stripes with alternating colors, use painter’s tape to mask off the areas where you don’t want paint to go.
- Double-Check Alignment: Before you start painting, double-check that the painter’s tape is aligned with your guidelines to ensure straight and even stripes.
Paint Application Techniques
Now that your painter’s tape is in place, it’s time to apply the paint for those perfect stripes:
- Brush or Roll: Depending on your preference and the width of your stripes, you can use a paintbrush or a roller. Make sure your brush or roller is clean and dry.
- Painting Technique: Apply paint by moving the brush or roller parallel to the painter’s tape. Start from the edge of the tape and work your way towards the center of the stripe. This minimizes the risk of paint bleeding under the tape.
- Multiple Coats: Depending on the opacity of your paint colors, you may need to apply multiple coats. Allow each coat to dry thoroughly before applying the next.
- Remove Tape Carefully: After the final coat, while the paint is still slightly wet, carefully remove the painter’s tape at a 45-degree angle to ensure clean lines. Be cautious not to smudge the painted stripes.
- Touch-Ups: If needed, touch up any areas where the paint didn’t adhere perfectly to the wall or where there are minor imperfections.
By following these painter’s tape and paint application techniques, you can ensure that your wall stripes are straight, uniform, and visually appealing. Taking your time and using the right tools will lead to a professional-looking result.
Finishing Touches and Tips
Removing Painter’s Tape
As you near the completion of your striped wall, proper removal of painter’s tape is crucial for a clean and polished finish. Here’s how to do it:
- Timing is Key: Remove the painter’s tape while the paint is still slightly wet. This helps prevent the paint from bonding with the tape, ensuring clean lines.
- Angle Matters: Carefully peel off the tape at a 45-degree angle, pulling it away from the painted surface. This angle minimizes the risk of paint peeling or chipping.
- Go Slow and Steady: Take your time when removing the tape to maintain the integrity of your stripes. Rushing this step can lead to uneven lines.
Touch-Ups and Final Inspection
Before you consider your striped wall complete, perform touch-ups and a final inspection to ensure perfection:
- Inspect for Imperfections: Examine the wall closely for any imperfections, smudges, or areas where the paint may not have adhered perfectly. Address these issues with touch-ups.
- Blend Touch-Ups: When performing touch-ups, use a small brush and match the paint color precisely. Feather the touch-up paint into the surrounding area to create a seamless look.
- Let It Dry: Allow the touch-up paint to dry completely before stepping back to admire your beautifully striped wall.
Final Words:
Painting stripes on your walls is a creative and rewarding DIY project that can transform your living spaces. If you ever need professional assistance or expert advice on interior painting, remember that Simpco Painting is just a phone call away. Contact us at 804-840-9419 for top-notch residential painting services in Richmond, VA. Elevate your home’s aesthetic appeal with confidence and precision.
]]>Now, let’s get more in detail…
Accidental spills or paint splatters on your walls can be a frustrating sight. But fear not, removing acrylic paint from walls doesn’t have to be a daunting task. At Simpco Painting, your trusted provider of painting services in Richmond, we understand the importance of keeping your walls pristine. In this guide, we’ll share practical methods to help you get rid of acrylic paint stains and restore the beauty of your walls.
Materials You’ll Need
Gather Your Supplies
To get started with removing acrylic paint from your walls, here’s what you’ll need to gather:
- Clean Cloth or Sponge: Choose a soft, clean cloth or sponge to avoid scratching the wall surface.
- Warm Water: You’ll need warm water for some of the removal methods.
- Dish Soap: A mild dish soap can help break down paint stains.
- Rubbing Alcohol: This is an effective paint remover and can be found in most households.
- Paint Remover (Optional): If the paint is stubborn, consider using a paint remover from your local hardware store.
Safety Precautions
When working with paint removal, it’s important to take some safety precautions:
- Ventilation: Ensure the room is well-ventilated to minimize exposure to fumes from rubbing alcohol or paint remover.
- Gloves: Wear gloves to protect your hands from chemicals and to keep the paint off your skin.
- Eye Protection (Optional): If you’re using a paint remover, consider wearing eye protection to safeguard your eyes from splashes.
Now that you’ve gathered your supplies and taken necessary safety precautions, let’s explore the step-by-step removal methods for acrylic paint stains on your walls.
Step-by-Step Removal Methods
Method 1: Using Soap and Water
When it comes to removing acrylic paint stains from your walls, here’s a straightforward method using soap and water:
- Create a Soap Solution: Begin by mixing a few drops of mild dish soap with warm water in a bucket. You don’t need anything fancy; just use what you have at home.
- Dampen a Cloth or Sponge: Dip a clean cloth or sponge into the soapy water mixture. Make sure it’s damp but not dripping wet.
- Gently Scrub the Stain: Apply the soapy cloth or sponge to the acrylic paint stain on your wall. Use gentle, circular motions to avoid damaging the paint or the wall surface.
- Rinse and Dry: Once you’ve effectively removed the stain, rinse the area with clean water and a separate damp cloth to remove any soap residue. Pat the wall dry with a clean, dry cloth.
Method 2: Rubbing Alcohol
If the soap and water method doesn’t fully remove the acrylic paint, you can try using rubbing alcohol. Here’s how:
- Test in an Inconspicuous Area: Before applying rubbing alcohol, it’s essential to test it in an inconspicuous area of the wall to ensure it won’t damage the paint or the wall surface.
- Dampen a Cloth: Moisten a clean cloth or sponge with a small amount of rubbing alcohol. Avoid soaking it; a damp cloth is sufficient.
- Gently Rub the Stain: Gently rub the acrylic paint stain with the dampened cloth using light, circular motions. Be patient and avoid applying excessive pressure.
- Rinse and Dry: Once the stain is removed, rinse the area with clean water and a separate damp cloth to remove any residual alcohol. Pat the wall dry with a clean, dry cloth.
Remember to exercise caution when using rubbing alcohol, especially on painted surfaces. If the stain persists, you may consider professional assistance or alternative paint removal products available at your local hardware store.
Additional Tips for Tough Stains
Using a Paint Remover
For stubborn acrylic paint stains that refuse to budge, a paint remover can be a handy solution. Here’s how to use it:
- Choose the Right Paint Remover: Visit your local hardware store and select a suitable paint remover. Ensure it’s safe for use on the type of wall and paint you have.
- Read and Follow Instructions: Carefully read the instructions on the paint remover’s label. Be sure to follow them precisely to avoid any mishaps.
- Ventilate the Area: Work in a well-ventilated room or open windows to disperse fumes. Safety should always come first.
- Apply the Paint Remover: Apply the paint remover to a clean cloth or sponge and gently rub the stained area. Follow the recommended dwell time mentioned in the product instructions.
- Scrape Off Paint: Use a plastic scraper or a putty knife to gently scrape away the loosened paint. Be cautious not to damage the wall surface.
- Rinse and Clean: After removing the paint, rinse the area thoroughly with water and a clean cloth to remove any residual paint remover. Dry the wall with a dry cloth.
Seeking Professional Help
In some cases, tough acrylic paint stains may require professional expertise. Here’s when it might be a good idea to seek professional help:
- Extensive Damage: If the paint stain is accompanied by extensive damage to the wall, such as deep gouges or structural issues, it’s best to consult a professional painter or contractor.
- Historical or Valuable Surfaces: If you’re dealing with a historical or valuable surface, seeking professional assistance ensures that the removal process won’t harm the integrity or value of the wall.
- Safety Concerns: If you’re uncomfortable using chemical paint removers or dealing with tough stains, professional painters have the experience and equipment to handle such situations safely.
When dealing with tough acrylic paint stains, always prioritize your safety and the integrity of your walls. Seeking professional assistance when needed can save you time and ensure a successful outcome.
Prevention for Future Spills
Protecting Your Walls
Preventing future spills and paint accidents can save you the hassle of having to remove acrylic paint from your walls. Here’s how to protect your walls:
- Use Painter’s Tape: Apply painter’s tape along the edges and trim of the walls before you start painting. This creates a barrier and prevents paint from accidentally splattering onto the wall surfaces.
- Drop Cloths or Plastic Sheets: Lay down drop cloths or plastic sheets to cover the floor and nearby furniture. These protective coverings catch any paint drips or spills, ensuring they don’t reach the walls.
- Remove Wall Decor: If possible, remove wall decor, such as frames and mirrors, before painting. This eliminates the risk of accidentally getting paint on these items.
Covering Up During Painting
When you’re in the process of painting, taking precautions can prevent spills and splatters:
- Wear Protective Clothing: Put on old, comfortable clothing that you don’t mind getting paint on. Consider wearing a painting smock or apron for added protection.
- Use a Paint Tray with a Liner: If you’re using a paint tray, consider using a disposable liner. This makes cleanup easier and reduces the chances of accidental spills.
- Paint Carefully: Be mindful of your brush or roller to avoid excess paint dripping onto the walls. Wipe off excess paint before applying it to the wall.
Final Words:
Knowing how to remove acrylic paint from walls can save you time and money on repainting. However, if you ever need professional painting services in Richmond, don’t hesitate to contact Simpco Painting at 804-840-9419. Our experts are here to ensure your walls look their best. Keep your walls in top condition, and if accidents happen, you now have the know-how to address them.
]]>When it comes to preserving the beauty and protection of your home or commercial building, the longevity of exterior paint plays a crucial role. At Simpco Painting, your go-to residential painting service in Richmond, we understand the significance of a durable paint job. Let’s delve into the key factors that determine how long exterior paint lasts and discover strategies to ensure its extended lifespan.
Lets get more into the details…
Quality of Paint
Paint Quality Matters
The quality of the paint you choose significantly impacts how long your exterior paint job will last. Here’s why paint quality matters:
- Ingredients and Formulation: High-quality paints are formulated with better ingredients and binders, resulting in enhanced durability and resistance to fading, cracking, and peeling.
- Color Retention: Quality paints maintain their color vibrancy over time, even when exposed to harsh sunlight and weather conditions. This helps your property look fresh and appealing for an extended period.
- Adhesion: Premium paints adhere better to surfaces, reducing the chances of flaking or chipping. This ensures that your exterior paint remains intact and protects your building effectively.
Importance of Premium Paints
Investing in premium or top-tier paints can make a significant difference in the longevity of your exterior paint. Here’s why premium paints are essential:
- Enhanced Durability: Premium paints are designed to withstand the harshest elements, offering superior durability compared to lower-quality options.
- UV Resistance: They often have better UV resistance, preventing color fading and ensuring your property maintains its visual appeal for an extended period.
- Longer Lifespan: With their advanced formulations, premium paints tend to last longer, reducing the frequency of repainting and saving you money in the long run.
- Better Coverage: Premium paints typically provide better coverage, requiring fewer coats for an even finish, which further contributes to their longevity.
Choosing high-quality paints, such as premium brands, is a wise investment that can significantly extend the lifespan of your exterior paint job and keep your property looking its best.
Preparation and Surface Condition
H3 (Sub-subtopic 2A): Proper Surface Preparation
Properly preparing the surface before applying exterior paint is crucial for its longevity. Here’s why proper surface preparation matters:
- Clean Surfaces: Ensure the surface is clean and free from dirt, dust, and debris. Proper cleaning helps the paint adhere better and prevents peeling or flaking.
- Repair Imperfections: Address any cracks, holes, or imperfections on the surface by filling them with the appropriate patching material. This creates a smooth canvas for the paint.
- Sanding and Priming: Sanding the surface lightly and applying a suitable primer improves paint adhesion and promotes an even finish. Primer also helps prevent stains from bleeding through the paint.
Addressing Existing Issues
Addressing existing issues on the surface is vital to ensure the longevity of your exterior paint job. Here’s why it’s important:
- Rot and Decay: If there is wood rot or decay on the surface, it must be repaired or replaced before painting. Ignoring these issues can lead to further damage and premature paint failure.
- Mold and Mildew: If there’s mold or mildew on the surface, it must be removed and treated before painting. Failure to do so can result in the growth returning through the new paint.
- Peeling Paint: If there’s old, peeling paint on the surface, it should be scraped off completely before applying new paint. Paint applied over old, peeling layers will not adhere properly.
Proper surface preparation and addressing existing issues ensure that your exterior paint adheres well, lasts longer, and provides effective protection for your building. These steps are essential for a successful and durable paint job.
Climate and Weather
Impact of Climate on Paint
The climate in your area has a significant impact on how long your exterior paint will last. Here’s how climate influences your paint job:
- Temperature Extremes: Extreme temperature variations can cause the paint to expand and contract, leading to cracks and peeling. Hot and cold climates may require specific paint formulations.
- Humidity Levels: High humidity can contribute to mold and mildew growth, while low humidity can accelerate paint drying, affecting the application process. Understanding local humidity levels is essential.
- UV Exposure: Areas with high UV exposure, such as sunny regions, can cause paint colors to fade faster. UV-resistant paints are advisable for these climates.
Weathering and Its Effects
Weather conditions, including rain, snow, and wind, play a significant role in the durability of exterior paint. Here’s how weathering affects your paint job:
- Rain and Moisture: Excessive rain and moisture can lead to water infiltration, causing paint to bubble, peel, or blister. Proper waterproofing and drainage are essential in rainy climates.
- Snow and Ice: Snow and ice accumulation can put stress on painted surfaces. Properly sealed and weather-resistant paint helps protect against damage caused by freezing and thawing.
- Wind and Debris: Wind-blown debris can scratch or chip the paint. Exterior paints with high impact resistance are preferable in windy areas.
Understanding your local climate and weather patterns is vital when selecting the right paint and maintenance strategy to ensure your exterior paint lasts as long as possible.
Maintenance and Repainting
Regular Maintenance Practices
Regular maintenance practices are key to prolonging the lifespan of your exterior paint. Here’s why they matter:
- Cleaning: Periodically clean your painted surfaces to remove dirt, dust, and pollutants. This prevents buildup that can degrade the paint over time.
- Inspecting for Damage: Regularly inspect the paint for signs of wear, such as cracks, peeling, or chipping. Addressing these issues promptly can prevent further damage.
- Trimming Vegetation: Trim bushes and trees near your building to prevent branches from scratching or damaging the paint during storms or windy conditions.
Knowing When to Repaint
Knowing when it’s time to repaint is crucial to maintain the appearance and protection of your property. Here’s why recognizing the right time to repaint is important:
- Fading Color: If the paint color has significantly faded or lost its vibrancy, it’s a sign that your paint job may need refreshing.
- Visible Wear: When cracks, peeling, or blistering become noticeable, it’s an indication that the paint is no longer providing adequate protection.
- Weathering Signs: If your building has been subjected to severe weather conditions, such as storms or extreme heat, it may require repainting sooner.
- Regular Inspection: Perform regular inspections to assess the overall condition of the paint. Professional painters can provide guidance on when repainting is necessary.
- Aesthetic Preferences: Sometimes, the decision to repaint may be driven by your desire to update the color or refresh the appearance of your property.
Final Words:
The lifespan of your exterior paint depends on factors like paint quality, surface preparation, climate, and maintenance. If you’re seeking professional assistance to ensure a long-lasting and appealing exterior paint job, reach out to Simpco Painting at 804-840-9419.
Our team of experts in Richmond, VA, specializes in residential and commercial painting services. Let us help you protect and beautify your property for years to come. Contact us today and experience the difference of top-quality painting services.
]]>Lets get more into the detail…
When it comes to painting your home or commercial space, choosing the right type of paint is crucial for achieving a long-lasting and visually appealing result. At Simpco Painting, your trusted interior painters in Richmond, VA, we understand the importance of making an informed choice. Let’s explore the key differences between interior and exterior paint options to help you decide which one suits your specific needs.
Composition and Formulation
Interior Paint Composition
Interior paints are specially formulated to meet the needs of indoor spaces. They consist of a mixture of various components designed to create a durable and visually pleasing finish. Here are the key components found in interior paint:
- Pigments: Interior paints contain pigments that give color to the paint. These pigments are finely ground particles that provide the desired hue when mixed with the base.
- Binders: Binders, also known as resins, are substances that hold the pigments together and adhere them to the painted surface. In interior paint, binders are typically water-based (latex) or oil-based (alkyd).
- Solvents: Solvents are liquids that help keep the paint in a liquid state until it’s applied. In water-based interior paints, water serves as the solvent, while oil-based paints use organic solvents.
- Additives: Additives are included to enhance various properties of the paint, such as drying time, mold resistance, and coverage.
Exterior Paint Composition
Exterior paints are specifically engineered to withstand the elements and protect your building’s exterior surfaces. They have a different composition compared to interior paints. Here’s what you’ll typically find in the composition of exterior paint:
- Pigments: Similar to interior paint, exterior paints also contain pigments for color. However, they often have more pigments to provide better UV resistance and color retention.
- Binders: Exterior paints use binders that are more robust and weather-resistant than those found in interior paints. Acrylic and elastomeric binders are commonly used to create a flexible and durable finish.
- Solvents: Exterior paints may contain solvents to aid in application and drying, but they are generally formulated to be low-VOC (volatile organic compound) to meet environmental regulations.
- Additives: Exterior paint additives are selected to enhance weather resistance, mold and mildew resistance, and overall durability in harsh outdoor conditions.
Appearance and Finish
Interior Paint Finish Options
When it comes to interior paint, the finish you choose can significantly impact the appearance of your walls. Here are some common interior paint finish options:
- Flat Finish: A flat finish, also known as matte, has a non-reflective surface. It’s excellent for concealing imperfections on walls but may not be as easy to clean as other finishes. It gives a soft, velvety appearance to your walls.
- Eggshell Finish: An eggshell finish has a subtle sheen that falls between flat and satin. It’s a popular choice for living rooms and bedrooms as it offers a slight washability advantage while maintaining a more matte appearance.
- Satin Finish: Satin finishes have a gentle shine and are easier to clean than flat or eggshell finishes. They are often used in areas prone to moisture or high traffic, such as kitchens and bathrooms.
- Semi-Gloss Finish: Semi-gloss finishes provide a noticeable sheen and are highly durable. They are perfect for trim, doors, and areas that require frequent cleaning due to their ability to resist stains and moisture.
Exterior Paint Finish Options
The finish of your exterior paint not only affects the curb appeal of your property but also plays a crucial role in protecting it from the elements. Here are common exterior paint finish options:
- Flat Finish: Exterior flat finishes, like their interior counterparts, have a matte appearance. They are suitable for siding and other large surfaces but may require more maintenance, as they are less resistant to dirt and weathering.
- Satin Finish: Satin exterior finishes provide a subtle gloss and are popular for their durability and ease of cleaning. They work well on a variety of exterior surfaces, including wood, stucco, and metal.
- Semi-Gloss Finish: Semi-gloss exterior finishes offer a noticeable sheen and exceptional durability. They are commonly used on doors, shutters, and trim, as they can withstand exposure to the elements and provide a polished look.
- Gloss Finish: Gloss finishes provide a high level of sheen and are the most durable option. They are often used on surfaces that require maximum protection, such as railings and outdoor furniture. However, their shiny appearance may not be suitable for large exterior areas.
Durability and Weather Resistance
Interior Paint Durability
When it comes to interior paint, durability is often measured in terms of how well it can withstand everyday wear and tear. Here’s what you should consider regarding the durability of interior paint:
- Scratch and Scuff Resistance: Interior paints are typically designed to resist minor scratches and scuffs, making them suitable for areas with moderate traffic like living rooms and bedrooms.
- Stain Resistance: Some interior paints come with stain-resistant properties, making it easier to clean and maintain the appearance of your walls, especially in dining areas and children’s rooms.
- Mildew and Mold Resistance: Bathrooms and kitchens can be prone to humidity, which may lead to mildew and mold growth. Look for interior paints with mildew and mold-resistant features for these spaces.
Exterior Paint Weather Resistance
Exterior paint faces the challenge of harsh weather conditions year-round. Its ability to withstand these conditions is vital for the longevity of your home’s appearance. Here’s what you should know about the weather resistance of exterior paint:
- UV Protection: Exterior paint should have UV-resistant properties to prevent color fading and maintain a vibrant appearance, especially in sunny climates.
- Waterproofing: To protect against rain and moisture, exterior paint should form a waterproof barrier that prevents water from seeping into the building’s structure.
- Temperature Tolerance: Exterior paint must be capable of expanding and contracting with temperature fluctuations, preventing cracks and peeling during extreme weather conditions.
- Mold and Mildew Resistance: Like interior paint, exterior paint should also be resistant to mold and mildew growth, as damp conditions can lead to these issues on outdoor surfaces.
- Longevity: The overall lifespan of exterior paint is essential. A high-quality exterior paint should last for several years without requiring frequent repainting.
Application and Usage
Interior Paint Application
When it comes to painting the interior of your home or commercial space, the application process plays a significant role in achieving a satisfactory result. Here are some key considerations for interior paint application:
- Surface Preparation: Before applying interior paint, ensure that the surface is clean, dry, and free from dust and debris. Sanding and patching any imperfections is crucial for a smooth finish.
- Priming: In some cases, applying a primer is necessary, especially on new drywall or surfaces with stains. Primer helps the paint adhere better and can improve color consistency.
- Painting Techniques: Use appropriate painting techniques, such as cutting in (painting edges and corners with a brush) and rolling (applying paint with a roller), to achieve even coverage. Avoid leaving brush marks or roller lines.
- Ventilation: Adequate ventilation is essential when painting indoors. Open windows and use fans to ensure proper airflow and to help paint fumes dissipate quickly.
- Drying Time: Allow each coat of paint to dry completely before applying additional coats. Follow the manufacturer’s recommendations for drying times between coats.
Exterior Paint Usage Tips
When it comes to exterior paint, the environment and weather conditions play a significant role in the application and usage. Here are some tips for using exterior paint effectively:
- Clean Surfaces: Before painting exteriors, thoroughly clean surfaces to remove dirt, mildew, and loose paint. Pressure washing can be an effective method for cleaning.
- Repairs: Address any structural or surface repairs before applying exterior paint. This includes fixing cracks, replacing damaged siding, and ensuring the surface is sound.
- Weather Conditions: Pay attention to the weather forecast. Avoid painting in extreme heat, cold, or rainy conditions. Ideal painting temperatures are typically between 50°F to 85°F (10°C to 29°C).
- Proper Tools: Use the right tools and equipment, such as brushes, rollers, and sprayers, for the job. Quality tools can make a significant difference in the final result.
- Coat Thickness: Apply the recommended number of coats as per the manufacturer’s instructions. Thicker coats do not necessarily provide better protection and may lead to issues like peeling.
- Maintenance: Regularly inspect the exterior paint for signs of wear and tear, such as peeling or fading. Touch up areas as needed to prolong the life of the paint job.
Final Words:
Choosing between interior and exterior paint involves considering various factors like composition, appearance, durability, and application. At Simpco Painting, we offer expert painting services for both residential and commercial spaces in Richmond, VA.
Whether you need your living room refreshed or your business exterior revamped, we have the expertise to deliver top-quality results. Contact us today at 804-840-9419 or visit our website Simpco Painting to schedule a consultation with the leading interior painters in Richmond, VA.
Let us transform your space with a fresh coat of paint that not only looks great but also stands the test of time.
]]>- Select the Right Location: Choose a discreet area for sampling and clean it thoroughly.
- Gather Your Tools: Collect a utility knife, plastic bags, painter’s tape, paper, and safety gear.
- Label the Sample: Properly label and store the collected sample for accurate color matching.
- Scrape Carefully: Use a sharp blade to scrape a small piece of paint from the wall.
- Protect the Surroundings: Apply painter’s tape to safeguard nearby surfaces.
- Dispose of Debris: Clean up any paint chips or debris to maintain a tidy workspace.
Now, let’s get more into the details:
Are you considering a fresh coat of paint for your home or office space? One essential step in the painting process is getting an accurate paint sample from your wall. This crucial task ensures that you achieve the perfect color match for your interior or exterior. At Simpco Painting, your trusted interior painters Richmond, VA, we understand the importance of this step. In this guide, we’ll walk you through the process of getting a paint sample from your wall and provide expert tips to help you achieve the best results.
Tools and Materials You’ll Need
Whether you’re a seasoned DIY enthusiast or a first-time painter, having the right tools and materials on hand is crucial for successfully obtaining a paint sample from your wall. Let’s break it down into two key aspects: gathering the essentials and preparing your workspace.
Gathering the Essentials
Before you begin the paint sampling process, ensure you have the following items:
- Utility Knife or Razor Blade: You’ll need this for precise paint sample collection. Make sure it’s sharp to avoid jagged edges.
- Plastic Bags or Ziplock Bags: These are useful for storing and labeling your paint samples. Make sure they seal tightly to prevent any spills or contamination.
- Painter’s Tape: This helps protect the surrounding area from accidental damage during the sample collection.
- Paper and Pen: Keep these handy for labeling your samples. Note down the location or room where each sample was taken for easy reference.
- Safety Gear: Don’t forget safety glasses and disposable gloves to protect yourself during the process.
Preparing Your Workspace
A well-organized workspace ensures a smoother and more efficient paint sampling process. Here’s what you need to do:
- Clear the Area: Remove any furniture, decorations, or obstacles from the wall you plan to sample. This will give you ample space to work without hindrance.
- Cover Surfaces: Protect the floor and any remaining furniture with drop cloths or plastic sheets to catch any paint chips or debris.
- Ventilation: Ensure there’s proper ventilation in the room. Open windows and doors to allow fresh air to circulate and minimize exposure to paint fumes.
- Good Lighting: Proper lighting is essential for accurate sampling. Use bright, natural light or additional lamps to clearly see the paint color.
With your tools and materials gathered and your workspace prepared, you’re now ready to proceed with the paint sampling process. In the next section, we’ll guide you through the step-by-step process of getting a paint sample from your wall.
Step-by-Step Guide to Getting a Paint Sample
Now that you have your tools and workspace ready, let’s dive into the step-by-step process of obtaining a paint sample from your wall. It’s a straightforward process, but attention to detail is key for accurate results.
Selecting the Right Location
- Identify the Sample Area: Start by determining the specific area of the wall from which you want to take a paint sample. Ideally, choose an inconspicuous spot or a location that won’t be highly visible once the paint is repaired.
- Clean the Surface: Before taking the sample, clean the selected area with a mild detergent and a damp cloth. This ensures that you’re collecting the actual paint color without any dirt or dust interference.
- Let it Dry: Allow the cleaned area to dry completely before proceeding. This helps in achieving an accurate color match.
Scrape the Paint Sample Safely
- Use Painter’s Tape: Apply painter’s tape around the perimeter of the sample area. This tape acts as a protective barrier, preventing any damage to the surrounding paint.
- Cut the Sample: Take your utility knife or razor blade and make a small, shallow cut in the center of the sample area. Gently scrape off a small piece of paint, ensuring you collect both the top layer of paint and any layers underneath.
- Collect in a Bag: Carefully transfer the paint sample into a plastic bag or a ziplock bag. Seal the bag tightly to prevent any paint chips from escaping.
- Label the Sample: Write down the location or room where the sample was taken on a piece of paper and place it inside the bag. This labeling is crucial for keeping track of the samples.
- Clean Up: Remove the painter’s tape, and discard any paint chips or debris. Dispose of your gloves and any used materials properly.
With the paint sample collected, you’re one step closer to achieving the perfect color match for your project. In the next section, we’ll explore some valuable tips for accurate color matching to ensure your paint job turns out just the way you envision it.
Tips for Accurate Color Matching
Achieving the perfect color match for your paint project is essential to ensure a seamless and harmonious finish. Here are some valuable tips to help you with accurate color matching:
Properly Label and Store Your Sample
- Detailed Labeling: When you collect paint samples, make sure you label them accurately with the location, date, and any additional notes. This information will be invaluable when it’s time to match the color.
- Store Samples Properly: Keep your labeled paint samples in a cool, dry place away from direct sunlight. Proper storage helps maintain the integrity of the colors over time.
- Check in Various Lighting: To accurately match the color, view your samples in different lighting conditions, including natural daylight and artificial lighting. This ensures that the chosen color looks good in all scenarios.
- Consider Different Sheens: Keep in mind that paint sheen (e.g., matte, satin, or glossy) can affect how a color appears. Test your samples with the same sheen you intend to use in your project.
Consult with Professional Painters
- Expert Advice: Sometimes, achieving the perfect color match can be a challenging task. If you’re uncertain or want a professional opinion, don’t hesitate to consult with experienced painters or color specialists.
- Custom Color Matching: Professional painters often have access to advanced color matching technology, which can create custom paint colors to match your sample precisely.
- Sample Testing: Painters can apply small sample patches on your wall to ensure the selected color looks perfect in your specific environment.
- Quality Assurance: Hiring professional painters like Simpco Painting ensures that you not only get the right color match but also a high-quality paint job that enhances the overall aesthetic of your space.
By following these tips and, if necessary, seeking expert guidance, you can be confident in your color choice and achieve the desired look for your interior or exterior painting project. In the final section, we’ll emphasize the importance of hiring professional painters and how Simpco Painting can assist you with your painting needs.
Why a Professional Paint Job Matters
Now that you’ve learned how to obtain an accurate paint sample and achieve the perfect color match, let’s emphasize why entrusting your painting project to professionals like Simpco Painting matters.
Benefits of Hiring Simpco Painting
- Expertise and Experience: Simpco Painting brings years of experience to the table. Our skilled painters have tackled various projects, from residential to commercial, and possess the expertise needed for exceptional results.
- Quality Workmanship: We take pride in delivering top-notch workmanship. When you hire us, you can expect clean lines, smooth finishes, and meticulous attention to detail that only professionals can provide.
- Efficiency: Our team works efficiently to complete your project on time, minimizing any disruption to your daily routine. We understand the importance of a timely finish.
- Proper Preparation: Proper surface preparation is critical for a long-lasting paint job. We ensure that surfaces are adequately prepped, primed, and ready for paint application.
- Custom Solutions: Simpco Painting offers tailored solutions to meet your specific needs. Whether it’s color selection, paint type, or special requests, we work closely with you to deliver the results you desire.
Contact Us for Your Painting Needs
If you’re ready to transform your space with a fresh coat of paint and want the assurance of a professional touch, don’t hesitate to get in touch with Simpco Painting. We’re here to serve your painting needs in Richmond, VA, and the surrounding areas.
Contact us today at 804-840-9419 or visit our website at Simpco Painting to learn more about our services and how we can make your painting project a hassle-free success. Trust Simpco Painting for all your residential and commercial painting needs.
With Simpco Painting, you can expect exceptional quality, attention to detail, and a beautiful finish that will enhance the aesthetics of your home or office. Get started on your painting project with us today!
]]>However, it’s essential to consider individual project details and consult with professionals for a more accurate estimate. For precise timelines and a hassle-free painting experience in Richmond, VA, contact Simpco Painting, your trusted expert in residential and commercial painting.
Now, let’s see in detail…
When it comes to giving your residential or commercial property a fresh, vibrant look, knowing how long it takes to paint a house is crucial. The time invested in this process can impact not only the aesthetics of your space but also its functionality and overall appeal. Whether you’re a homeowner looking to rejuvenate your living environment or a business owner aiming to create an inviting atmosphere, understanding the timeline for a paint job is essential.
At Simpco Painting, we take pride in being your go-to professional painter in Richmond, VA, known for our expertise in both residential and commercial properties. We understand that the timing of a paint job can significantly influence your plans and expectations. That’s why we’re here to provide you with valuable insights into the factors that affect painting timelines and to ensure that your project is completed efficiently and to your satisfaction.
If you’re in Richmond, VA, and seeking a trusted partner to transform your property with precision and professionalism, consider Simpco Painting, your painter in Richmond VA. Let’s explore the various factors that determine the duration of a house painting project, so you can plan accordingly and achieve the results you desire.
Factors Influencing Painting Time
The time it takes to paint a house can vary based on several critical factors. Understanding these factors can help you plan your project effectively.
Size and Complexity of the Property
- Property Size: Naturally, the larger your property, the more time it will take to complete the paint job. It involves a more extensive surface area to cover, both inside and outside. Residential and commercial properties of different sizes have varying painting timelines.
- Architectural Complexity: The architectural design and complexity of your property can influence the time required. Properties with intricate details, such as decorative moldings or unique features, may demand additional time and attention to ensure a thorough and professional finish.
- Number of Rooms or Areas: When it comes to interior painting, the number of rooms or areas you want to paint also affects the timeline. Each room represents a separate project, with its own preparation and painting requirements.
Surface Condition and Preparation
- Surface Condition: The condition of your walls plays a significant role. If your surfaces have cracks, peeling paint, or other imperfections, additional time will be needed for repairs and surface preparation before painting can commence.
- Proper Preparation: Proper surface preparation is key to a successful paint job. This includes cleaning, sanding, patching, and priming. Rushing through these steps can compromise the quality of the finish, so it’s essential to allocate sufficient time for thorough preparation.
- Type of Paint: The type of paint you choose can impact the time required. Some paints require multiple coats for full coverage, while others offer better coverage in a single application.
Interior vs. Exterior Painting Time
The time required for painting varies between interior and exterior surfaces due to distinct considerations.
Interior Painting Considerations
- Room Size: The size of the room being painted can impact the timeline. Larger rooms may take more time, especially if they have higher ceilings or intricate architectural details.
- Number of Rooms: Painting multiple rooms or areas within your property will extend the overall time needed for an interior project.
- Furniture and Obstacles: If you need to move or cover furniture and navigate around obstacles, it can add time to the project. Clearing and preparing the space is an essential part of the process.
- Drying Time: Interior paint typically dries faster than exterior paint, which can affect the time between coats and the overall project duration.
Exterior Painting Considerations
- Surface Area: Exterior surfaces generally have a larger area to cover, including walls, trim, and sometimes additional features like decks or fences.
- Weather Dependency: Exterior painting timelines are often dependent on weather conditions. It’s essential to choose suitable weather for the project, as rain or extreme temperatures can delay the process.
- Preparation and Repairs: Exterior surfaces may require more extensive preparation, such as pressure washing, repairs to siding or trim, and priming. These additional steps can impact the overall timeline.
- Type of Paint: Exterior paint is formulated to withstand harsh weather, and it may require longer drying times between coats compared to interior paint.
Understanding these differences in interior and exterior painting considerations is vital when estimating the time required for your project. In the next section, we’ll explore the advantages of professional painting services and how they can streamline your project.
Professional Painting Services
Opting for professional painting services can significantly impact the efficiency and quality of your project.
Benefits of Hiring Professionals
- Expertise and Efficiency: Professional painters bring a wealth of expertise and experience to your project, ensuring efficient work and a high-quality finish.
- Time Savings: Professionals work efficiently, saving you valuable time, which is especially important for businesses or large residential projects.
- Quality Results: Experienced painters use top-quality paints and equipment, resulting in a more durable and visually appealing finish.
- Custom Solutions: Professionals can offer custom solutions tailored to your needs, whether it’s color selection, texture, or special finishes.
- Convenience and Cleanliness: Professional painters handle all aspects of the project, from preparation to clean-up, ensuring a hassle-free experience.
- Longevity: A professionally executed paint job is more likely to stand the test of time, reducing the frequency of repaints and long-term maintenance costs.
- Enhances Property Value: Well-maintained and professionally painted properties enhance their overall value and appeal.
- Stress-Free Experience: Hiring professionals takes the stress out of painting. You can trust them to deliver quality results.
Contact Simpco Painting for a Consultation
If you’re considering a painting project, why not make it a seamless and rewarding experience? At Simpco Painting, we are your trusted professional painters in Richmond, VA. We specialize in both residential and commercial properties, offering expert services tailored to your unique needs.
Contact us today to schedule a consultation. We’ll work closely with you to understand your vision, recommend the right solutions, and provide a detailed plan. Let’s transform your property with precision and professionalism.
Final words:
The time required to paint a house depends on various factors, including property size, architectural complexity, surface condition, and whether it’s an interior or exterior project. These considerations are vital for effective planning and achieving desired results.
When it comes to painting your residential or commercial property in Richmond, VA, the advantages of hiring professionals are clear. Professional painters bring expertise, efficiency, and a commitment to quality, ensuring that your project is completed with precision and excellence. This not only saves you time and reduces stress but also enhances the longevity and value of your property.
If you’re ready to begin a painting project or seek expert guidance, please don’t hesitate to reach out to Simpco Painting. Contact us at 804-840-9419 or visit our website at Simpco Painting to schedule a consultation. Let’s transform your property into a masterpiece that surpasses your expectations.
]]>